Calem Blogs
How to Set up Scheduled Reports in Calem
Scheduled reports have been improved in Calem Enterprise 2019. It allows one to set up a report and emailed to users based on time schedules. Work order reports are supported at this time. Additional reports may be added in the coming releases based customer feedback.
The following is a use case addressed by this feature.
- Send a report that only shows work orders for the day before. For instance, the Tuesday emailed report would include all work orders created 12am - 11:59pm on Monday of certain categories, not all work orders. This report would need to go out every morning, even if no records meet the criteria (just to show that there were no work orders).
The first step is to create a scheduled report.
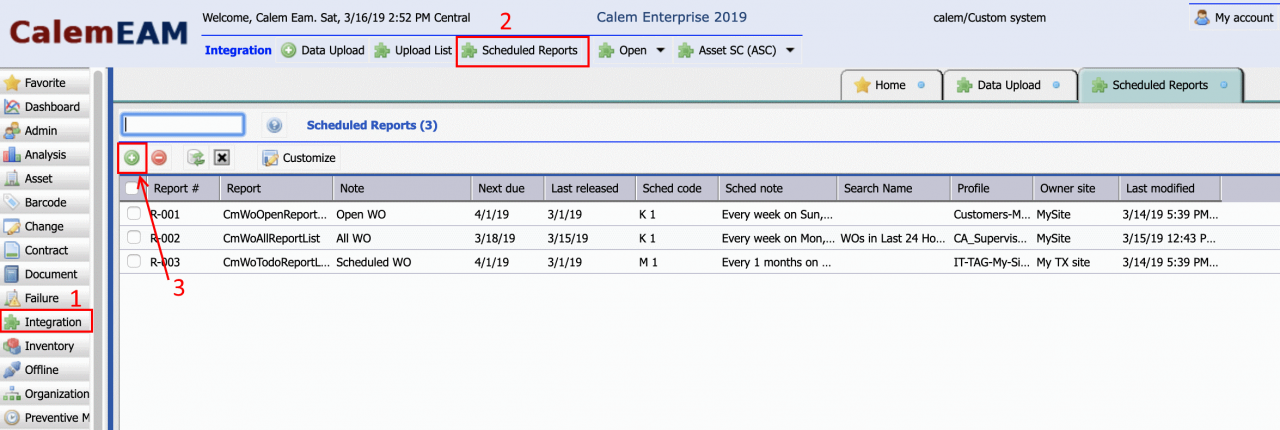
- Menu path: Integration | Scheduled Reports | Create (+). Click Integration module (1) to show module menu at the top of the page. Next, click "Scheduled Reports" to show the scheduled report lists (2). Click "+" in the scheduled report list to create a new schedule report.
- Next, fill out the information to create the report.
- Select a "Report" by looking up an existing report enabled for scheduling.
- "Note" will be populated based on the "Report". Change it if needed. It is used as the subject of the email notification.
- Set "Owner site" for access control - only users with access to this site can see this report in the scheduled report list.
- "Owner user" will default to the user creating the report. Change it if needed. The owner user and report monitors receive emails if the report failed to generate.
- "Search Id" refers to a saved search for the report. Go to Work Order | Report | All WO. Create a shared search and save it. The saved search will be applied to report when it is generated.
- "Profile" is the "ACL Profile" used to filter data for this report. It is also used to find the custom layout for the report.
- "Next due" defines today or a future date to start generating the report. It must be defined for the report to auto-generate.
- "Schedule" defines the frequency to generate the report. For instance, the report is generated every day except Sunday (just as an example, you may make it generate every day per your requirements).
- "Locale" sets the locale for the report.
- "Description" is the long description of the report. It will be included in the email body of the report.
- The report is generated as an excel file and attached to the email sent to recipients of the report.

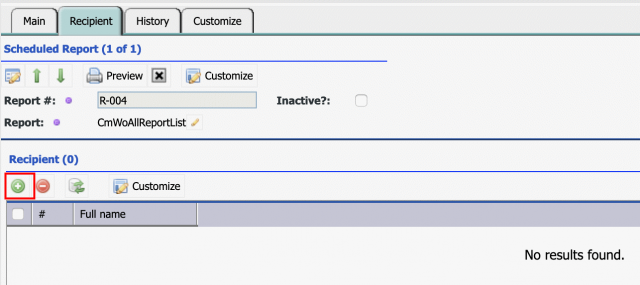
Step 2. Add Recipients
Once the report is saved, add email recipients from the "Recipient" tab of the scheduled report.
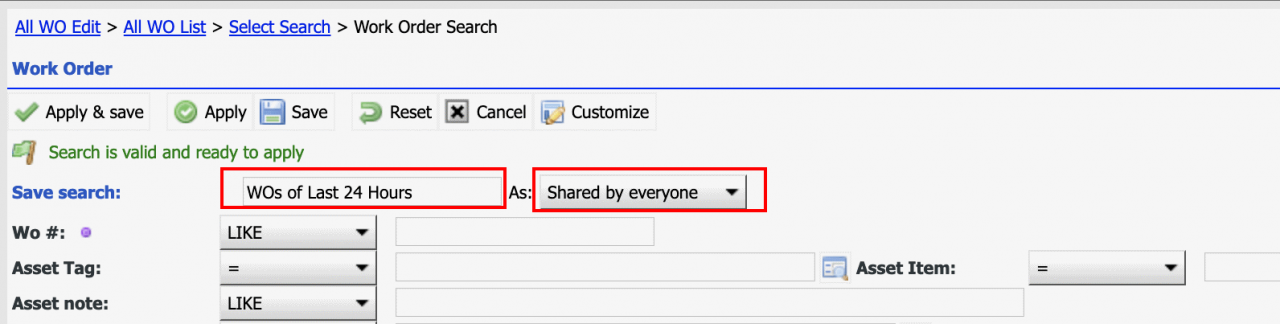
Step 3. Add Saved Search
A saved search can be created from the report referenced in the scheduled report.
- For this example, go to Work Order | Report | All WO to open the report list and add a saved search. See this blog for setting up saved search in Calem. The search must be saved as "Shared by everyone" for use with scheduled reports.
- Next, we will use native MySQL functions to define the report date range for "Time requested" field. Native MySQL expressions are supported by "${" and "}" tags. For instance, you may use "subdate" to define yesterday as: ${subdate(curdate(), interval 1 day)}, and today as "${curdate()}".
- DateTime fields in Calem are stored in GMT time zone in the database. You may add time portion to the date range based on your report time zone. For instance, US Central Daylight Time is 5 hours behind GMT. The date range for yesterday 12:00 am to 11:59 pm is from ${concat(subdate(curdate(), interval 1 day), " 05:00:00")} to ${concat(curdate(), " 04:59:59")}.

Step 4. Preview Scheduled Reports
User "Preview" menu from the Scheduled Report form to preview a report.

Step 5. Scheduled Task for Scheduled Report
The scheduled report process needs to be set up as a scheduled task for execution every day in the early morning. The process script is Calem_Home/bin/integration/rpt_sched.sh (or, rpt_sched.bat for Windows).
Customers of Calem Cloud Services may contact Calem Support to enable scheduled reports. Customers with on-site deployment need to set up a cron job (in Linux) or a scheduled task (in Windows) to generate scheduled reports.
Step 5.1. Manually Execute Scheduled Report
You may launch scheduled report process during development from the web UI:
- Menu path: Admin | Open | Server Process

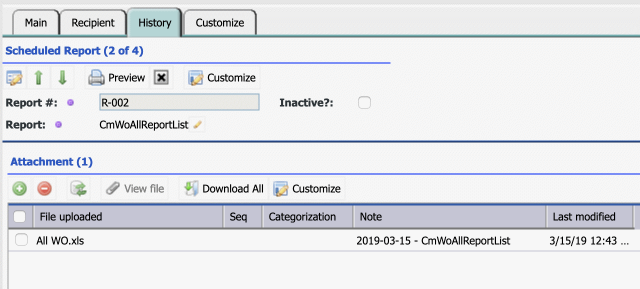
Step 6. Review Scheduled Reports
Scheduled reports are generated and stored as attachments.
- The history tab of a scheduled report shows reports generated. Reports of more than 30 days will be deleted.
- Outbound emails from Calem can be reviewed at Admin | Open | Workflow Email Queue. See this blog for more info.
- Finally, you may set up "Report Monitor" roles from Organization | ACL Profiles | Monitor User. These users will get email notification when a scheduled report fail to generate.
Additional resources
- How to Set up Weekly PM Reports
- Saved Search in Calem
- How to Track Outbound Emails in Calem
- How to Customize List|Report in Calem
- How to Set Up Workflow Notifications for Work Orders
- User Guide and Admin Guide (customer account required)
- Calem Enterprise Training Site
- Calem Enterprise Blogs
- Calem Enterprise demo
About the author

Related Posts
By accepting you will be accessing a service provided by a third-party external to https://www.calemeam.com/