Calem Blogs
Login User Setup
Users can be added to Calem through data entry forms, upload from excel files, import from LDAP servers, or auto-creation via email service requests. One can create as many users in Calem as needed. However, login users require license seats and profile configuration.
In this blog I will cover the steps to set up users to log into Calem. User entry forms are used to create users.
Step 1. Create User
The first step is to create a user in Calem. Here are the menu paths to create users:
- Organization module | ACL Profiles | User list | Create. Use this menu to create users of your company or external companies such as customers or vendors.
- Organization module | EAM company | Employee Tab | Employee list | Create. Use this menu to create users of your company.
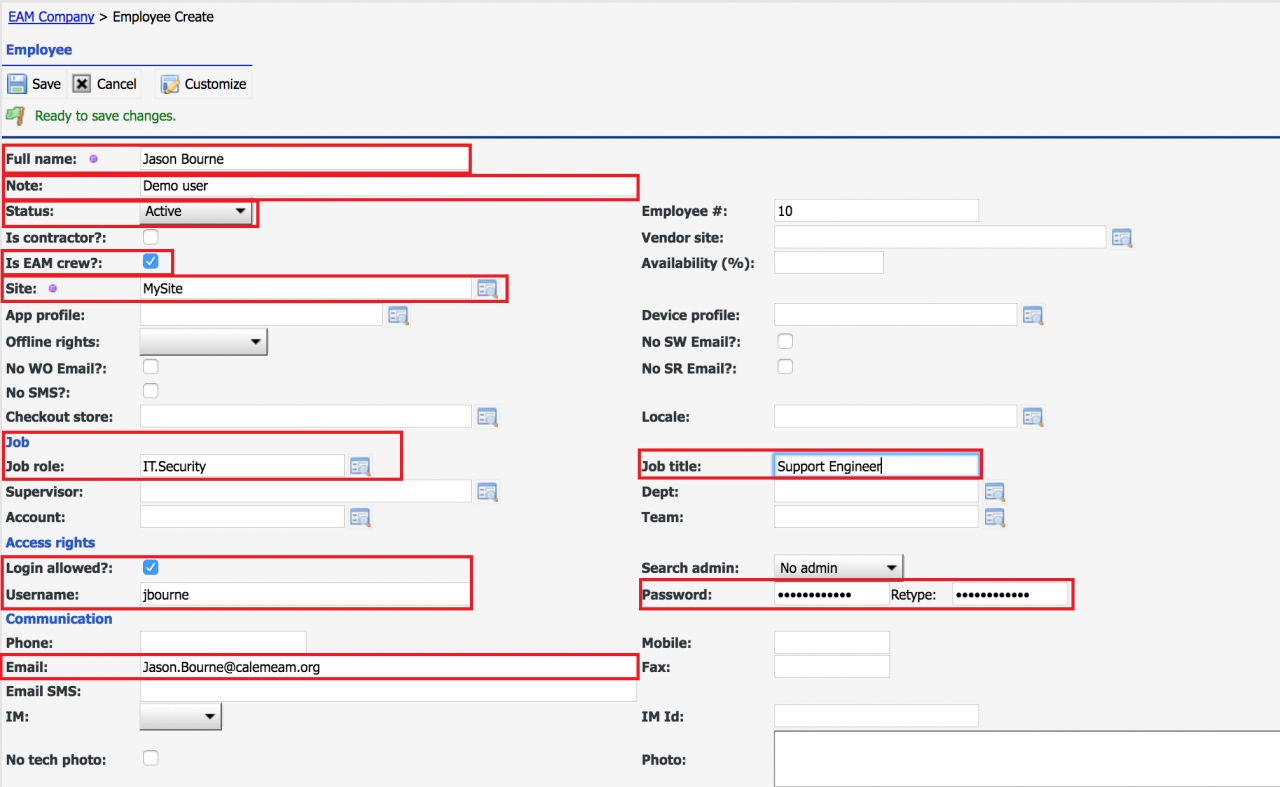
- Enter the full name of a user and a short note.
- Tick "Maintenance" checkbox if the user can be assigned to work orders.
- Set the user's "Site", "Job role" and "Job title"
- Set "Username" and password. Alternatively, have user set own password at login by clicking "Forgot your password?" at login screen. A user's "Email" must be configured for setting own password.
- Set "Email" for the user to receive workflow notifications and to reset own password.
- You can optionally set other fields as needed.
- When you are done, click "Save" to create the user.
1.2 Upload Users
Users can be uploaded from an excel file. The menu path is: Integration | Data Upload. Here is the excel template file to use to populate users and upload to Calem.
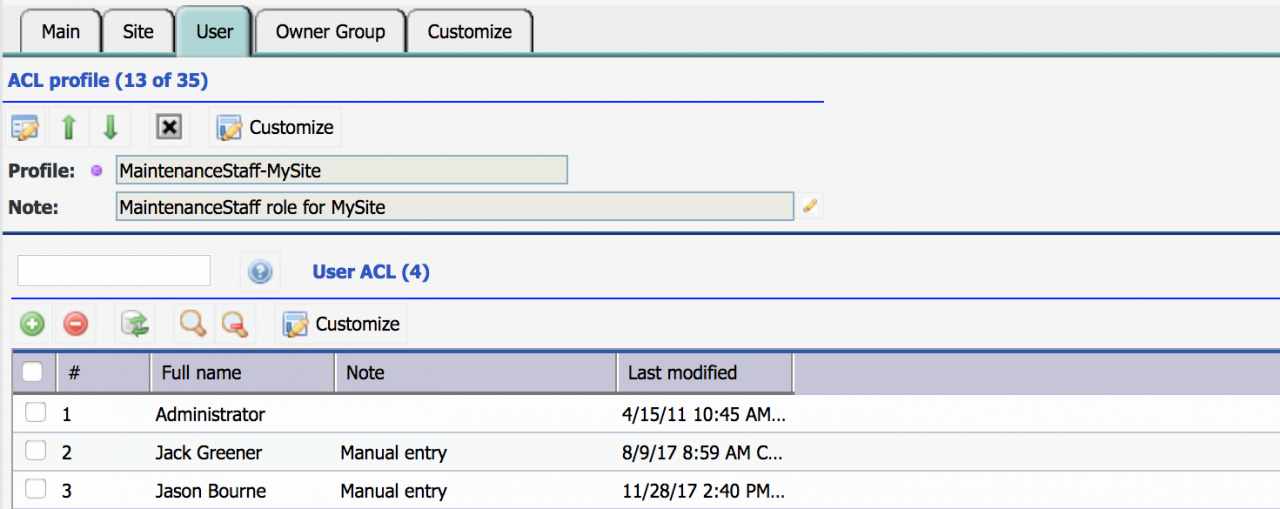
Step 2. ACL Profile
Next, an ACL profile must be assigned to a login user. An ACL profile defines the access rights including modules, screens and sites. Set up ACL profiles based on job roles and sites in your organization. There are a few menu paths to assign ACL profiles:
- Organization module | ACL Profiles | User list | Search for the user and open the user form. Then, go to the "ACL Profile" Tab at the user form. Click "+" to add an ACL Profile.
- Alternatively, you may go to Organization module | ACL Profiles | ACL profile list. Open the ACL profile you like to assign the user to. Then, go to the "User" Tab in the ACL profile form. Click "+" to add a user to the list.
- Alternatively, go to Organization module | EAM company | Employee Tab. Search and open a user form. Click "ACL Profile" Tab of the user form. Then, click "+" to add an ACL Profile.
Step 3. License Seat Assignment
Finally a login user must have a license seat to log into Calem. This step is necessary for customers with fixed license seats. This step can be skipped if you have only floating user license seats.
- For a user who uses Calem often on a daily basis you may assign a user seat in the following menu path.
- Admin module | Open | User seat | Click "+" to assign seats to users
- For instance, add "Jason Bourne" to the list so Jason has a user seat and can log into Calem.
- Alternatively, you may use the attached excel template to upload user assignments.
- For users who log into Calem occasionally you may have the user share floating license seats with other users. See this blog for more information about fixed and floating license seats. Users without seats assigned above will use floating seats automatically. There are no additional configuration needed.
- For organizations with a site license, all users can log into Calem without seat configuration. Just skip the license seat assignment step.
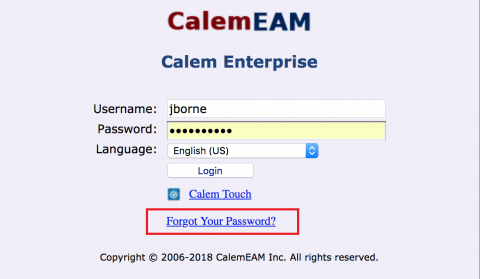
Step 4. Password Recovery
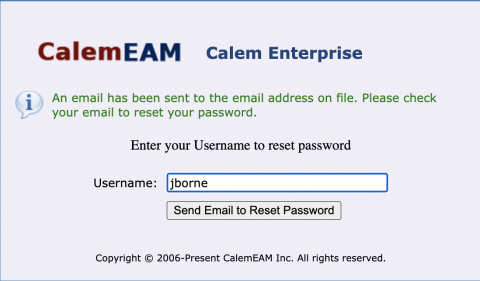
A user may need to recover or reset own password if the password is forgotten or the user account is blocked if a user failed to login several times in a row (default is 4). At the login screen, click "Forgot your password?".
- Calem will need your username and send a password reset email to your email address on file.
- If email was not received, you may check out your spam folder.
- You have up to 30 minutes to reset your password before the email expired.
Step 5. Reset Password by Admin
Admin users with access to Organization module can reset passwords for other users.
- Menu path: Organization | ACL Profiles | User list
- Find the user from the list and click to open the user record.
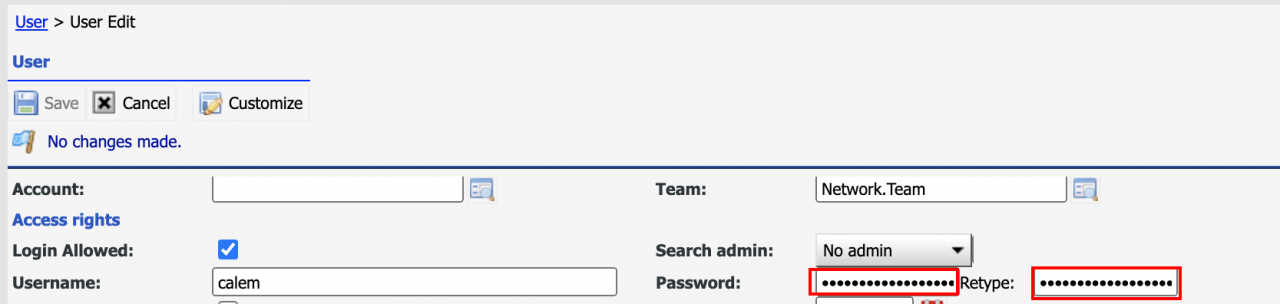
- Click "Edit" to modify the user record
- Enter the password and retype it to confirm. A password needs to have 8 chars at a minimum including at least a letter of lower case, a letter of upper case, and a digit.
- Save the change to reset a password.
Step 6. Reset Password by Login User
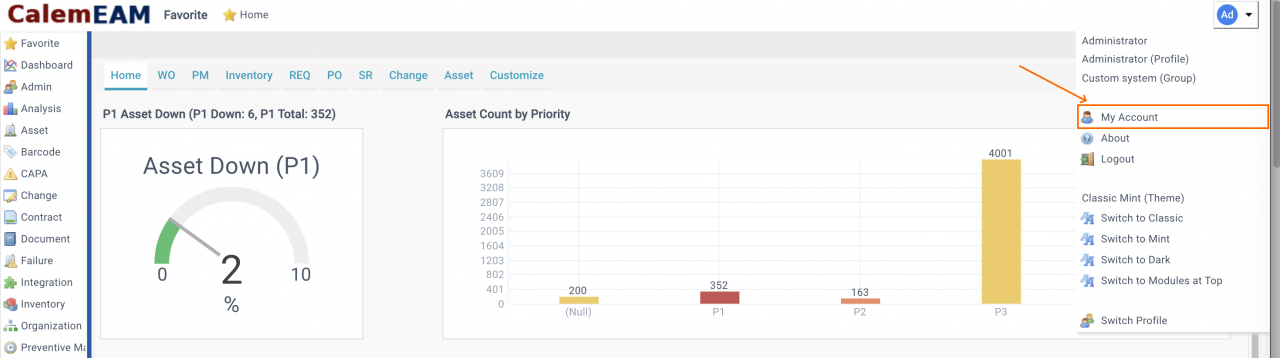
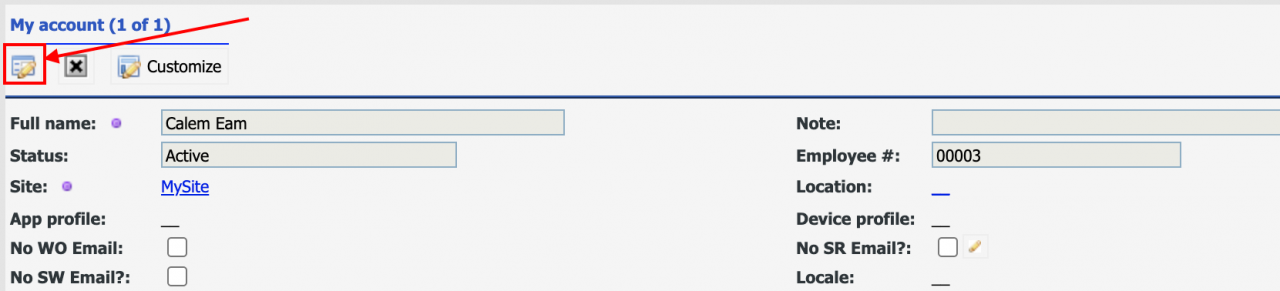
A user can reset own password by clicking the "My account" at login desktop. The user record of the login user is shown. Click "Edit" to edit the password.


Step 7. Troubleshoot Login Issues
- The "Status" of the user must be "Active"
- The user must have a "Username" and "Email" address to use "Forgot Your Password?" to configure a password to login.
- The user must have at least one valid "ACL Profile" configured.
- A user must have a user seat configured if fixed license seat is used.
Step 8. Inactive Users
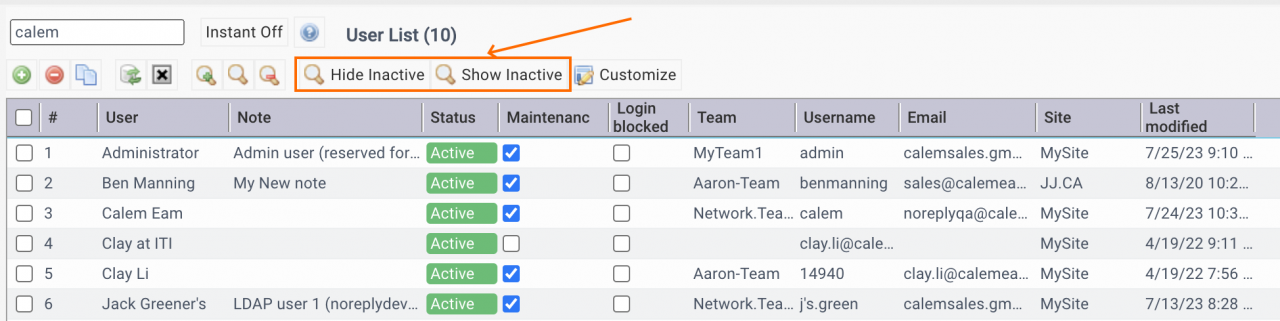
The User List (Organization | ACL Profiles | User List) shows active users by default. Use "Show Inactive" menu to include inactive users in the list.
- Your "User List" may not include the "Show Inactive" menu if you have customized the list form.
- You may customize the form again to show "Show Inactive" and "Hide Inactive" menu.
Additional resources
About the author

By accepting you will be accessing a service provided by a third-party external to https://www.calemeam.com/