List views are used extensively in Calem Enterprise. They include:
- Main Data Lists such as work order lists
- Detail Data List such as scheduled labor lists for a work order
- Lookup List such as cost center lookup list
- Report List such as work order report list
- Report Detail List such as scheduled labor lists in work order print
Step 1. Group vs. Personal Customization
Group customization is performed to customize views for a user group. Admin module permission is required to do it. Personal customization is performed for the login user only. It does not affect other user's views.
- To customize for a user group, go to Step 2.
- To customize your own views, go to Step 3.
- A personal customization overwrites group customization. For example, if you customized the asset list report, you will always see the personal view of your report regardless of which ACL profiles you log in with.
- A personal customization can be deleted by the login user.
- Personal customization can be turned off by profiles - see this blog.
Step 2. Group Customization
Groups are used in Calem to represent users of the same job roles. For instance, you can create a "MaintenanceTechnicians" group for maintenance technicians; and "MaintenanceSupervisors" for supervisors of the maintenance department.
- The group hierarchy facilitates customization management.
- A child group inherits its parent group's customization and can overwrite the parent group's customization.
- "Custom System" is the root group for your service. You may customize at this group if you need to customize the default system views for every group and user. However, a child group can have own customization overwriting the customization of "Custom System".
- "Admin" group is the top group to customize for all supervisor groups.
- "Users" group is the top group to customize for all non-supervisor groups.
- You can add child groups based on your business needs.

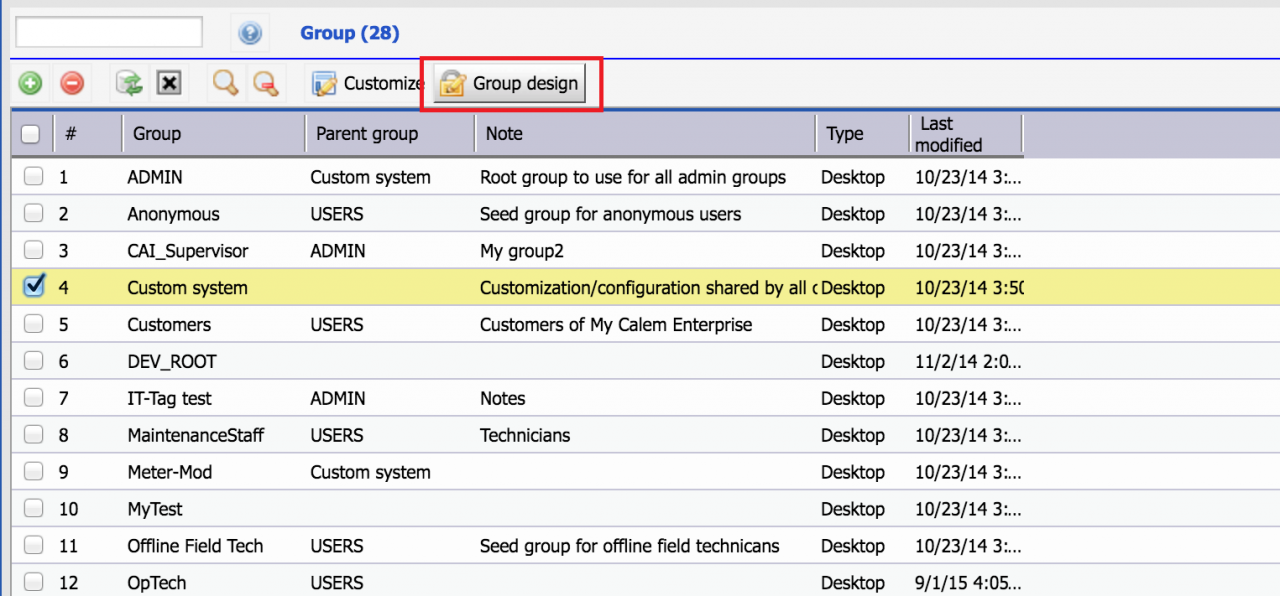
The menu path to select a group is: "Admin module | Groups". Check a group for customization and click "Group design" to tell the system that all customization will be for this group. In screenshot below, the customization is for "Custom system" group.
Step 3. Customize a List View
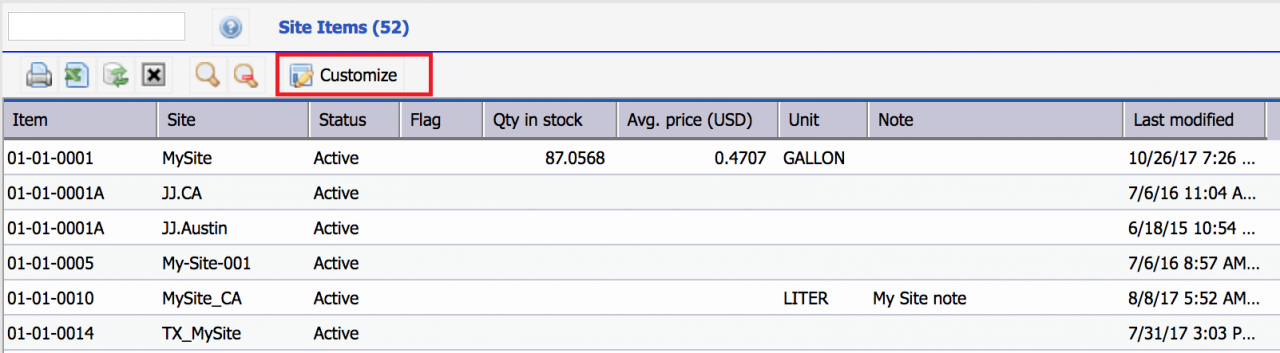
Navigate to the list view you like to do the customization. Click "Customize" button in the list view's toolbar to start the customization.
The following customization is available for list views.
- Add or remove menu items from the list menu bar. Just drag a menu item and drop it at the "Form design" node in the left panel.
- Add or remove fields in the list view. Right click in the caption row, select a field to include or exclude it.
- Change the orders of fields in the list view. Drag a field and drop it in another field to move a field around.
- Change the width of each field in the list view. Just drag the sash of the column to increase or reduce its width.
- Finally, click the "Save" button in the left panel to save a customization.
- Use the delete button ("-") to remove a customization.

Step 3.1 Lookup List Field Widths
A lookup list can be customized like a list view. For instance, here are the steps to customize the widths of a lookup list.
- Select a group to customize (Step 2 above). For instance, check "Custom system" and click "Group design".
- Next, go to the lookup list. For instance, click "Work Order" and "+' to create a WO. Use the lookup button in "Cost center" field to launch cost center lookup.
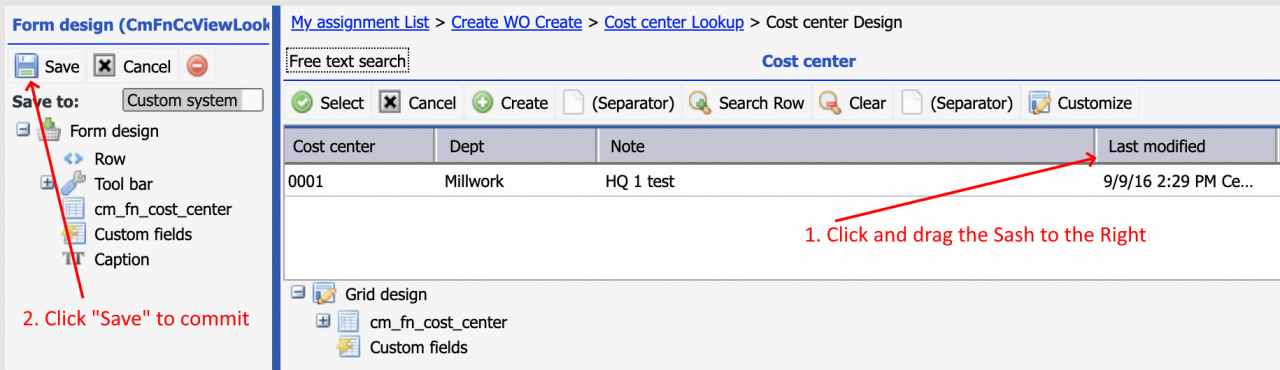
- Click "Customize" button to customize the cost center form.
- Click and drag the sash of a column to the right to increase a column's width; or drag a sash to the left to reduce its width.
- Click "Save" in the left panel to commit the change.
Step 3.2 Hide Fields in List Views
Fields can be hidden in the list view for a group so these fields are not visible from list view customization by end users (if customization is enabled for end users).
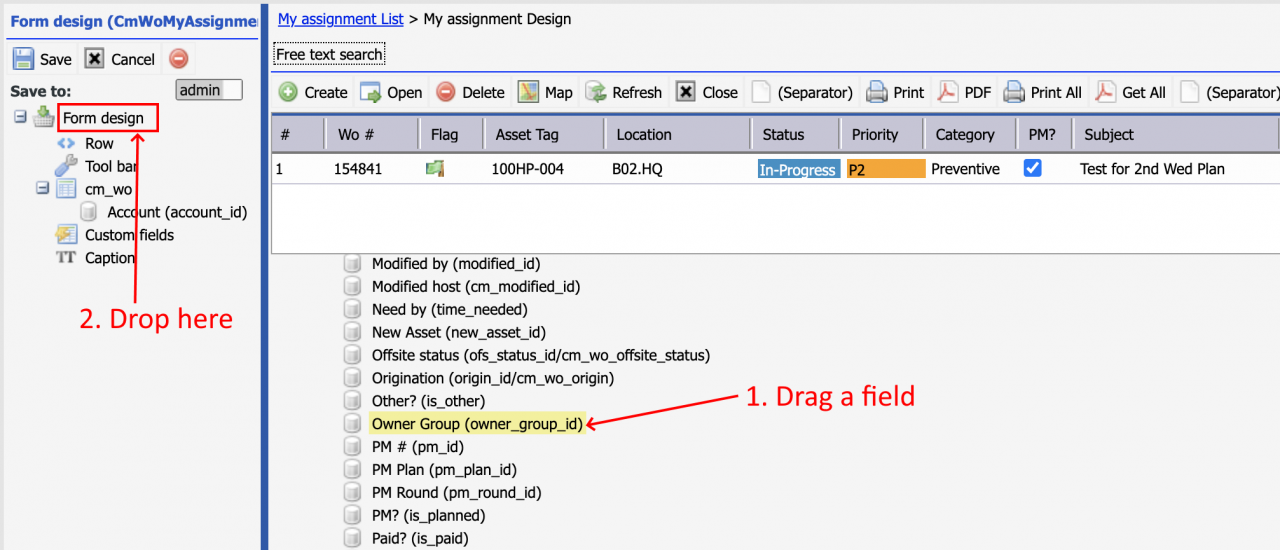
- Drag a field node from the field tree under the list view and drop to "Form Design" in the left panel to hide that filed.
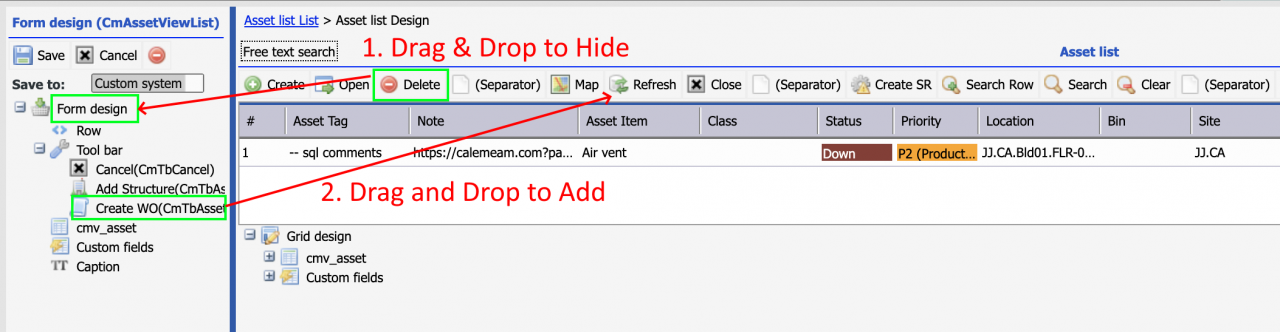
Step 3.3 Hide/Add Menu
Menu items can be removed/added by drag-and-drop from the form menu bar.
- Drag a menu item from the form menu bar and drop to "Form design" in the left panel to remove it from the form.
- Drag a menu item from under Toolbar and drop to the form menu bar in the right panel to add it to the form.
Step 4. Delete a View Customization
A view customization can be deleted from the view customization screen (in Step 3).
- If you are customizing a view for a group, the group's custom view is deleted.
- If you are customizing a view for personal account, the personal custom view is deleted.
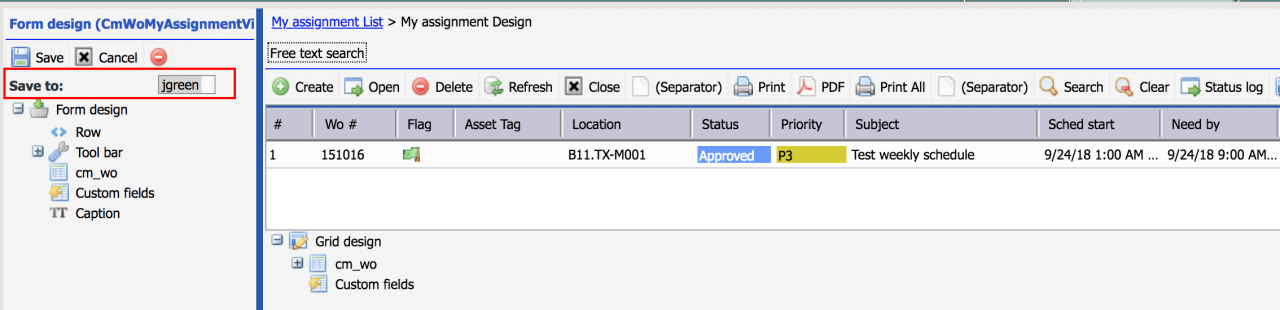
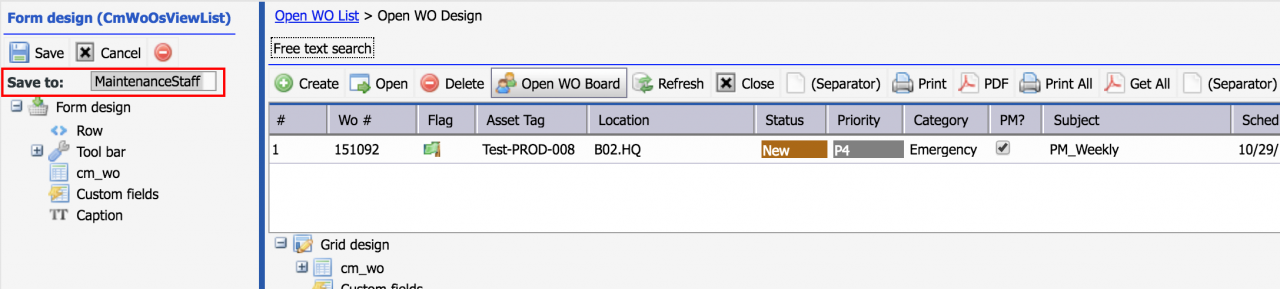
- You can tell if a design is for a group or a user by the "Save to" field in the left panel of the customization screen.
The screenshot below is group customization for group "MaintenanceStaff".
Step 5. Customization Reports and Deletion (Group & Personal)
Users with access to Admin module can view group and personal customization in Calem.
- After deleting views log out and back in for the changes to be effective.
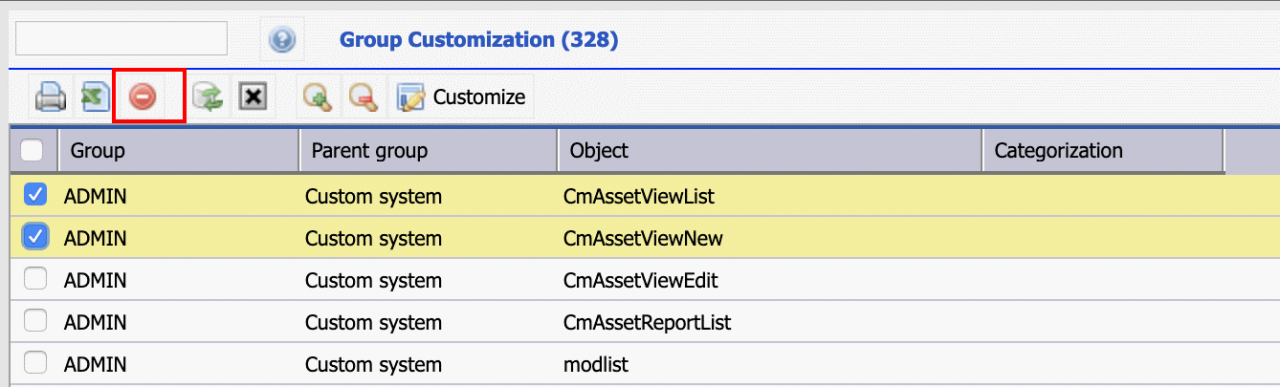
- Group customization: Admin | Report | Group Customization
- Group customization can be deleted from the report list. It allows admin to remove group customization.
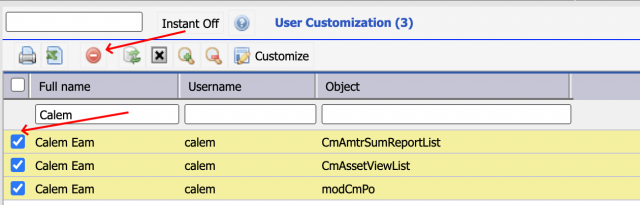
- Personal customization: Admin | Report | User Customization
- Personal customization can be deleted from the report list. It allows admin to remove personal customization. Group customization will be used when personal customization is removed.
- See screeshot below. This can be done for more than one view/report by checking the views/reports first, then click "Delete" (-) button to delete them.
- Module access: Admin | Report | User Module Access
5.1 Object Customization
One can identify all customization by groups and users for a view or report object by the following steps:
- Use "Customize" menu in a form to identify its view or report object.
- For instance, go to site inventory form (Inventory | Site Inventories)
- Click "Customize" menu to customize the list form. The view name is shown in the left panel of the form design screen.
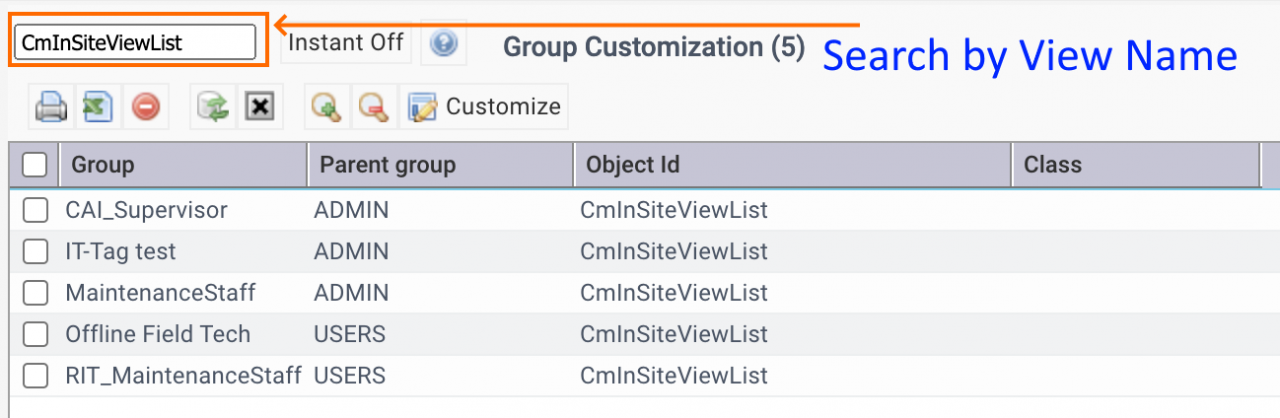
- Go to group customization report (Admin | Report | Group Customization). Search by the view name. All groups that customize the view are shown.
- Go to user customization report (Admin | Report | User Customization). Search by the view name. All users that customize the view are shown.


Step 6. Other Forms
In addition to list forms or reports, other forms can be customized the same way:
- Select a group for group customization.
- Navigate to a form (create, edit, view, lookup, search, etc.), click "Customize" to customize a screen.
- See Step 3 and 4 in this blog for examples.
- See Step 10 for forms with tabs.
Step 7. Custom Fields
Custom fields can be added to Calem and to a list view just like a normal field. See this blog for more info.
Step 8. Detail List View Captions
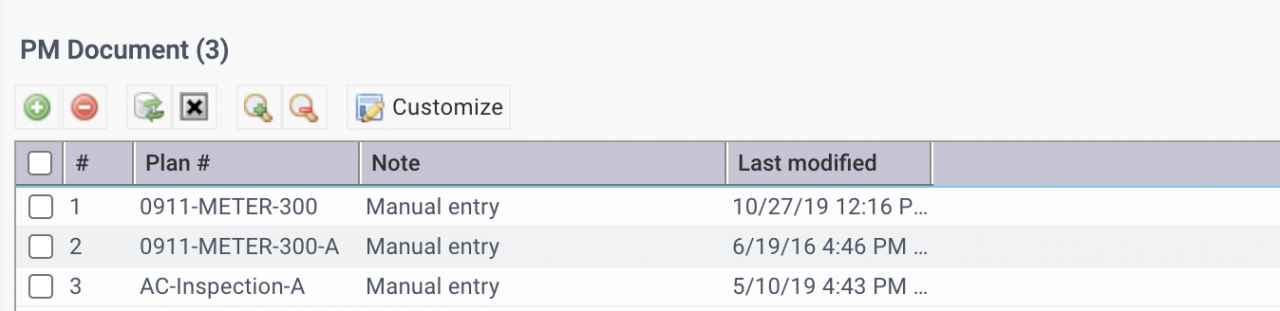
A detail list view shows data related to an object such as a work order. The caption of a detail list view can be embedded in the menu bar. For instance, the Attachment list below has caption embed in the menu bar. The caption can also be shown above the menu bar. For instance, the PM Document list's caption is shown above the menu bar.

8.1 Embedded Caption
For detail lists captions should be embedded in the menu bar so that 1) it is efficient in the use of screen estate; 2) it allows Calem to use responsive layout (the less data a detail list has the less screen estate it takes).
- The first screenshot below is the correct view with embedded caption and without "caption" and "free text search".
- The second screenshot below is the one to be customized.
- The steps to customize the second screen to the first one are described below.
The following steps can be taken to embedded caption and remove "caption" and "free text search" (if present) from the row above the toolbar. The process is irreversible.
- Select "Custom System" group for group design.
- If there are groups other than "Custom System" that include a customization of a detail list view, repeat the steps below for each of those groups.
- Go to a form, customize a detail list
- Drag the caption above the menu off the screen (2).
- If "Free text search" is shown in the screen, drag it off the screen, add List Search Row (the search icon with green +) to the toolbar.
- Drag the caption under Toolbar to the menu bar. It will be placed at the end of the toolbar. Drag the caption to the beginning of the toolbar.


8.2 Column Names
The layout also looks cleaner in having short column names or expand width of column in a list to avoid taking more than two rows. For instance, the column name "Qty in Stock" in the first screenshot below takes 3 rows. Getting it to show in two rows in the next screenshot looks better.


Step 9. Read View Headlines
The Headlines are available for work order and asset at this time.
- A headline includes the key information for an object. For instance, a work order's status, priority, and subject.
- A headline may not show if your forms are customized.
- You can enable headlines through customization
- Select "Custom System" group for group design.
- If there are groups other than "Custom System" that include a customization of a read view, repeat the steps below for each of those groups.
- Go to a form such as work order read form, customize it.
- Drag the caption above the menu off the screen.
- Drag the _Headline to the cell where the caption was in
- Save the change.

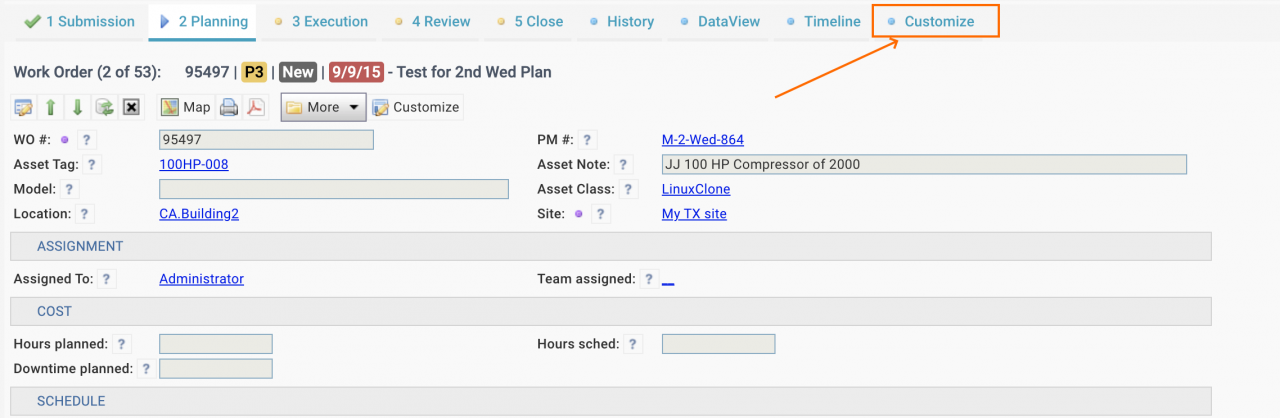
Step 10. Timeline Views (Form with Tabs)
The Timeline Views are available for work order and asset at this time. They are forms with tabs. Customizing these forms are similar to other forms. You can customize these forms by groups (through "Group Design" from Group List), or by personal login. The customize menu is the "Customize" Tab.
- A timeline view includes completion donuts and status timelines.
- A timeline view may not show if your forms are customized.
- You can enable the timeline views through customization
- Select "Custom System" group for group design. You may skip this step if you are customizing the form for yourself.
- If there are groups other than "Custom System" that include a customization of a detail list view, repeat the steps below for each of those groups.
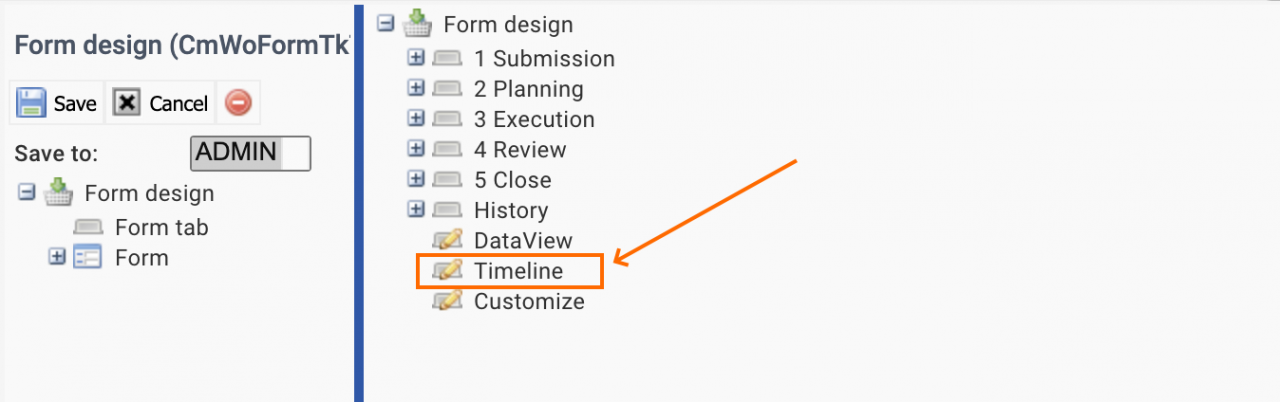
- Go to a form such as work order form, click the "Customize" Tab to customize the form.
- Drag the Timeline form tab to the tab list in the right panel from the let panel.
- Save the change.
- To delete your customization of a form with tabs:
- Customize the form (use the "Customize" Tab).
- Click "Delete" (-) to remove your customization.
Step 11. Clone Customization
The clone feature allows one to copy customization from one group to another. See this blog.
Step 12. Customization Log
Customization log records changes to group customization. It allows admin users to audit who and when changes are made to group customization. See this blog.
Additional resources
- How to Clone Group Customization
- How to Do Access Control by Roles (Group Design for Modules)
- Group vs Personal Customization
- How to Add Custom Fields and Customize Forms
- Work Order Print Customization - see the steps to select a group for customization.
- User Guide and Admin Guide (customer account required)
- Calem Enterprise Training Site
- Calem Enterprise Blogs
- Calem Enterprise demo